MY HOME LAB
A deep dive into how I built a SIEM environment using Wazuh, Ubuntu, and Windows to simulate real-world threat detection and log analysis.
My Wazuh SIEM Home Lab Journey
In the world of cybersecurity, theory only takes you so far. To truly understand how threats are detected and neutralized, you need to step into the shoes of a SOC Analyst. That's why I decided to build my own Wazuh SIEM home lab—a sandboxed environment where I can simulate real-world attacks and witness the power of defensive monitoring first-hand.
This project wasn't just about following a tutorial; it was about building a system that provides visibility into the "unknown" and sharpens my blue team instincts.
🧱 The Architecture: Creating a Unified Defenses
To build a meaningful lab, I needed a server-client relationship that mimics a corporate network. My setup consists of two primary components operating in a bridged network environment.
- The Brain (Wazuh Manager): A dedicated Ubuntu Server running in VirtualMachine. This acts as the command center, indexing logs and surfacing alerts.
- The Endpoint (Wazuh Agent): Installed on my Windows host machine, this agent reports every system heartbeat and suspicious event back to the manager.
By using a Bridged Adapter, I ensured both the virtual server and the physical host could communicate seamlessly on the same subnet, allowing for real-time log transmission.
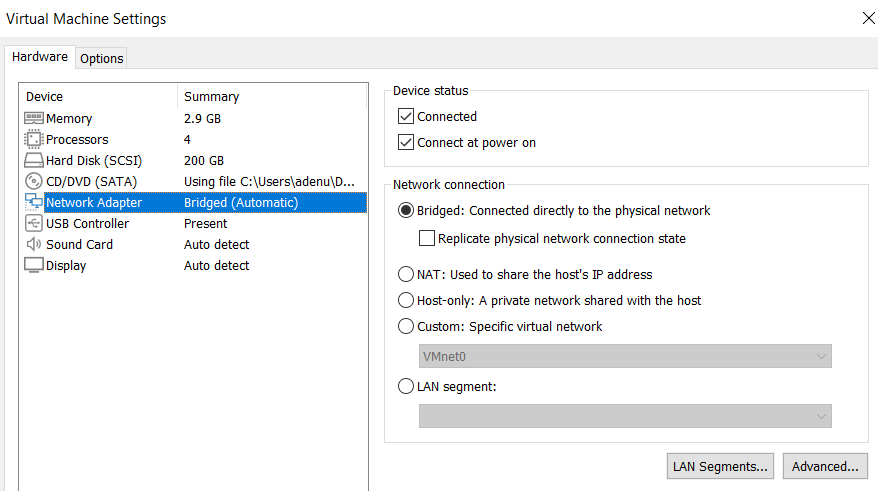 Visualizing the flow between the Windows agent and the Ubuntu manager.
The Build: From Zero to "Active"
1. Hardening the Core (Wazuh Manager)
I started with a fresh Ubuntu Server installation. Using the automated Wazuh installation script, I deployed the Wazuh Indexer, Manager, and the Dashboard.
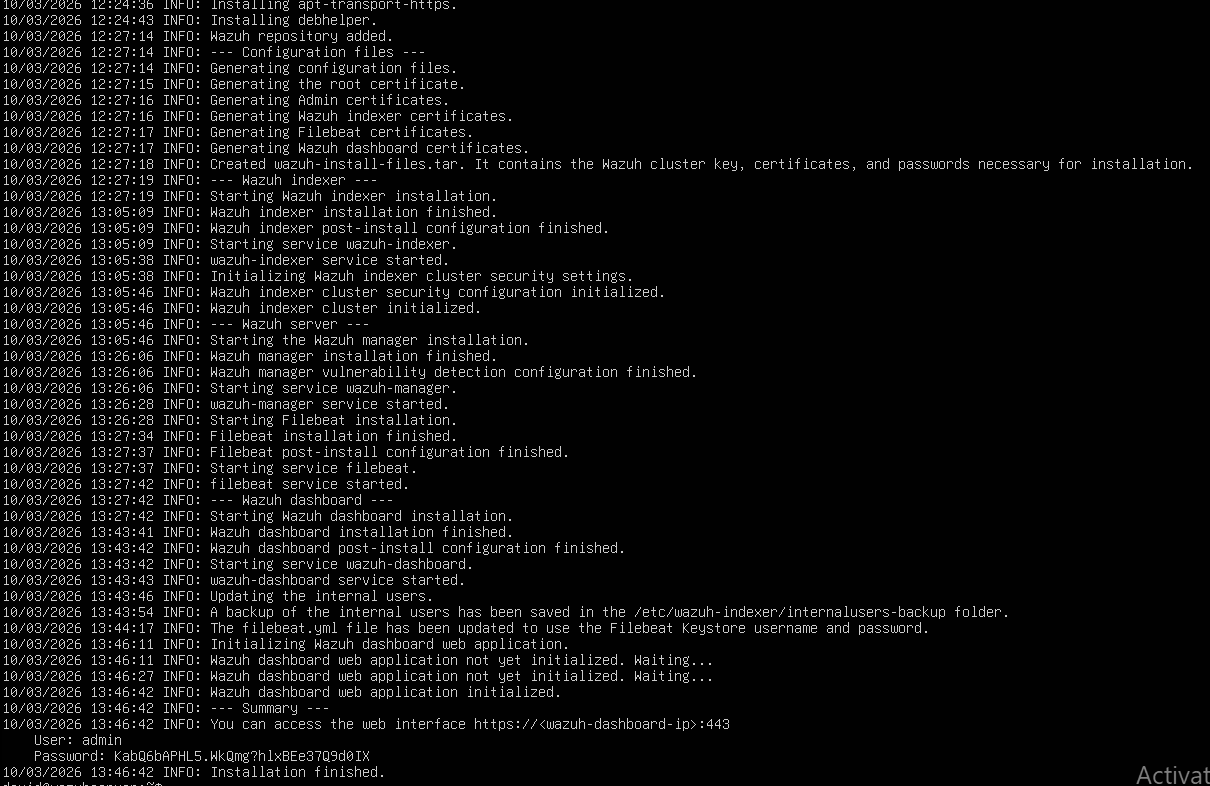 The automated setup script in action on the Ubuntu terminal.
2. Bridging the Gap (Wazuh Agent)
The real magic happens when you connect an endpoint. I downloaded the Wazuh agent on my Windows host and registered it using an authentication key generated from the Ubuntu manager.
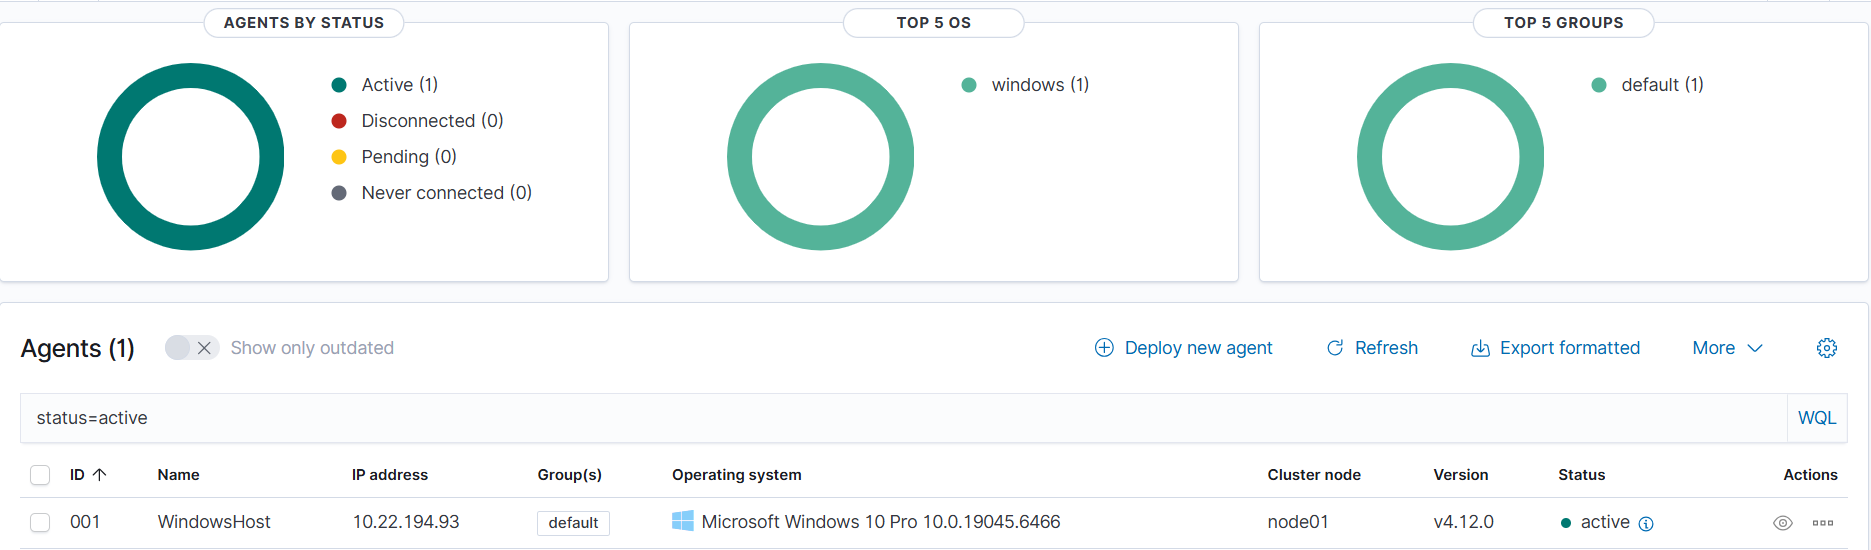 The moment the Windows agent status switched to 'Active' on the dashboard.
Watching the status change from "Never Connected" to "Active" was my first major milestone.
Turning on the Lights: File Integrity Monitoring (FIM)
A SIEM is only as good as the data it collects. To see Wazuh in action, I configured File Integrity Monitoring (FIM). I pointed the agent towards a sensitive "TestFolder" on my Windows machine and set it to monitor for any creation, modification, or deletion of files.
 Enabling real-time monitoring on the SOC_PROJECT directory.
When I intentionally modified a file, the dashboard immediately lit up with an alert. This simple test demonstrated exactly how SOC teams identify early signs of unauthorized access or ransomware behavior.
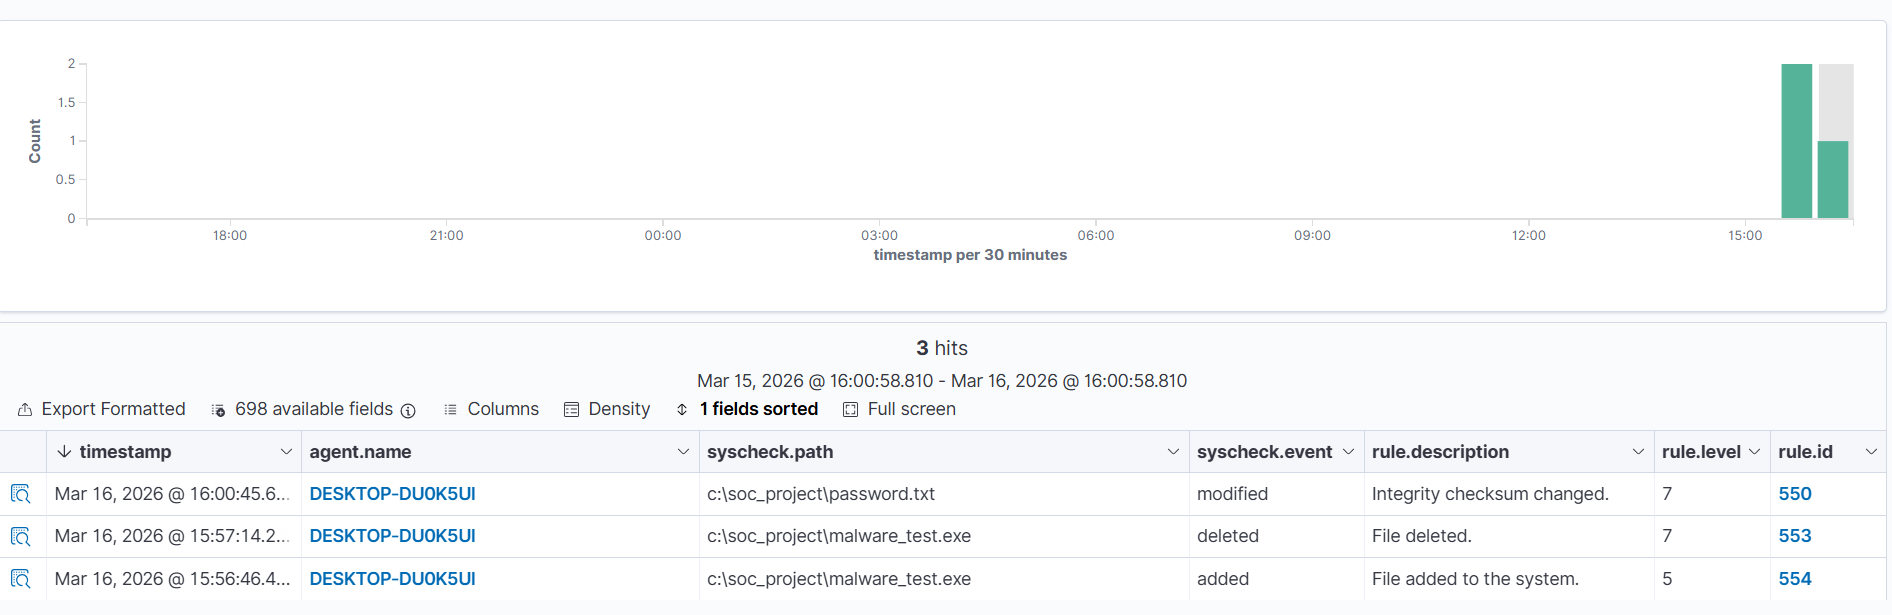 Wazuh reacting to unauthorized file changes in real-time.
Lessons from the Trenches
Building this lab taught me more than any textbook could:
- Context is King: A log entry is just a string of text until it's correlated with other events.
- Configuration Matters: Default settings are a starting point, but tuning your SIEM to ignore "noise" is where the real skill lies.
- Visualization is Power: The Wazuh Dashboard transforms raw data into a narrative, making it easier to spot patterns that might go unnoticed in a terminal.
What's Next?
This lab is just the foundation. My future roadmap includes:
- Simulating Brute-Force Attacks: Using tools like Hydra to see how Wazuh handles rapid failed logins.
- Integrating Threat Intel: Bringing in external feeds to automatically flag known malicious IPs.
- Incident Response: Moving from detecting threats to responding to them programmatically.
Building this lab has been one of the most rewarding steps in my cybersecurity journey. It’s no longer just about reading "how it works"—it’s about seeing it happen in my own environment.
Stay tuned for more updates as I continue to expand my defensive capabilities!